Feeds:
Posts
Comments

Posts Tagged ‘diy’

Garden Art

I don’t have a gardening post tonight.

This is the view off our deck this morning; it has since morphed to freezing rain on top of the two inches of already slick snow.

Yesterday, the sun was shining. I took a few photos of some of the yard art I have hanging around, just some bottles on Shepherd’s hooks. I make these in the heat of the summer months when it is too hot to garden and too nice out to be inside. I’m not one for air conditioning, shade does me just fine.

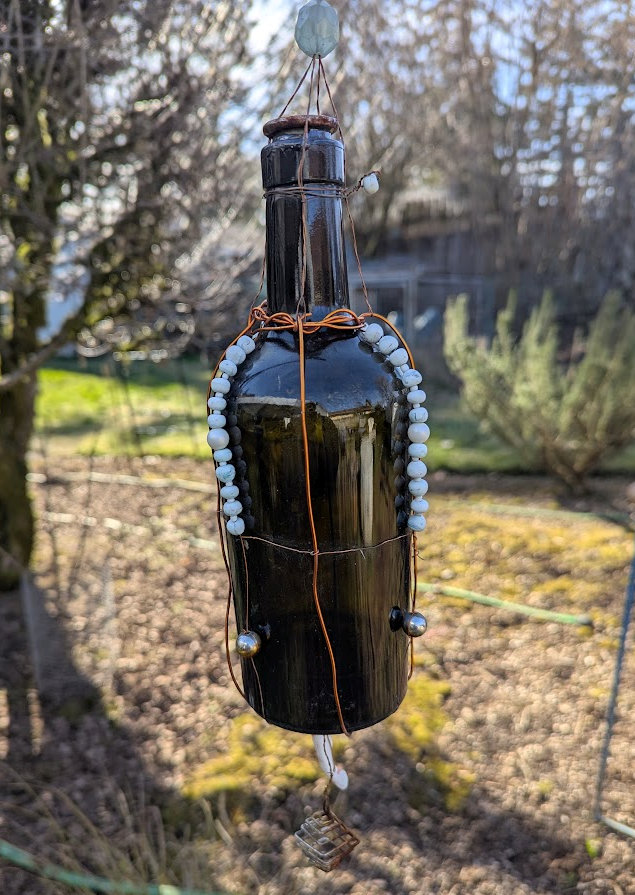
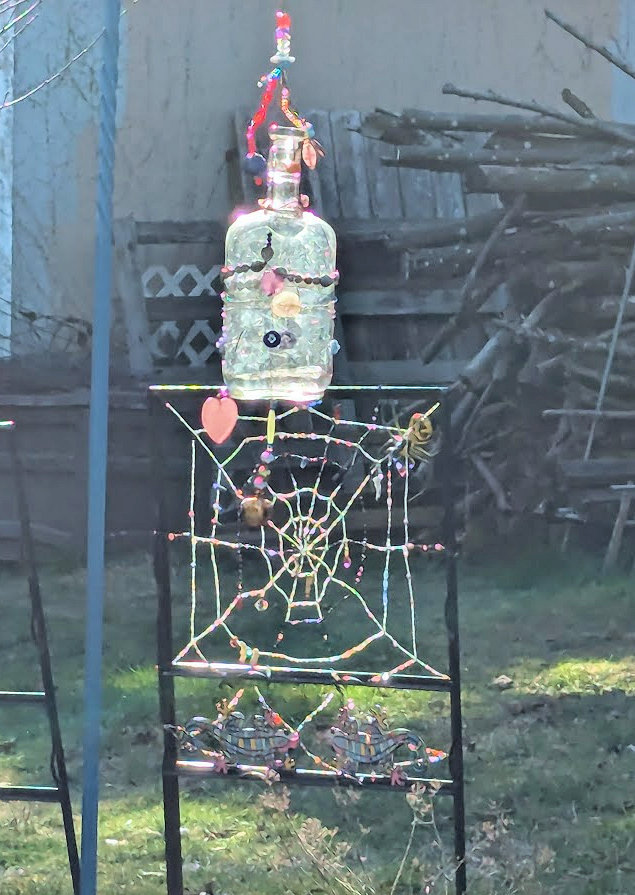
Beads, wire, some old bottle or some wine bottles. They serve no purpose other than to hang in my garden. Maybe they ward off evil spirits, but that isn’t why I make them. I make them because I need to keep my fingers busy. The spider web in the background is another summertime project done with beads and fine copper wire.

I make other things, too.

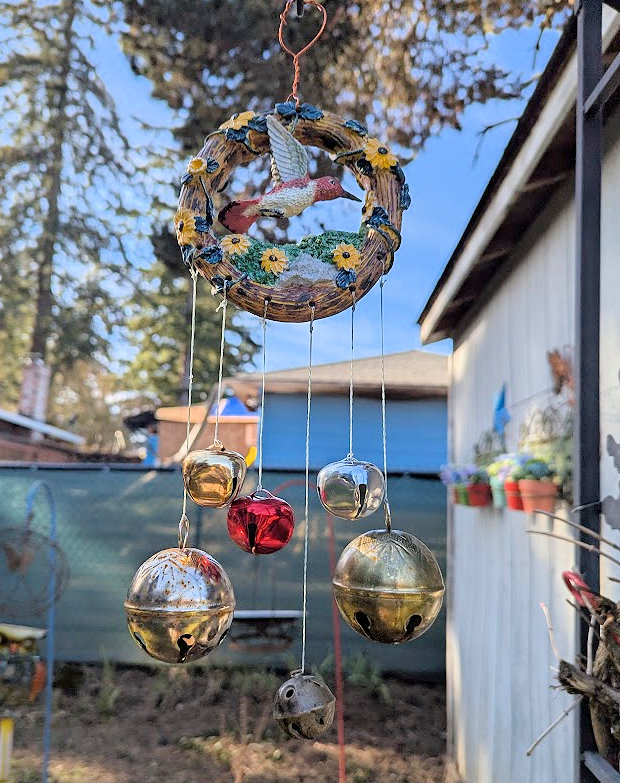
A mobile out of jingle bells and a resin hummingbird.

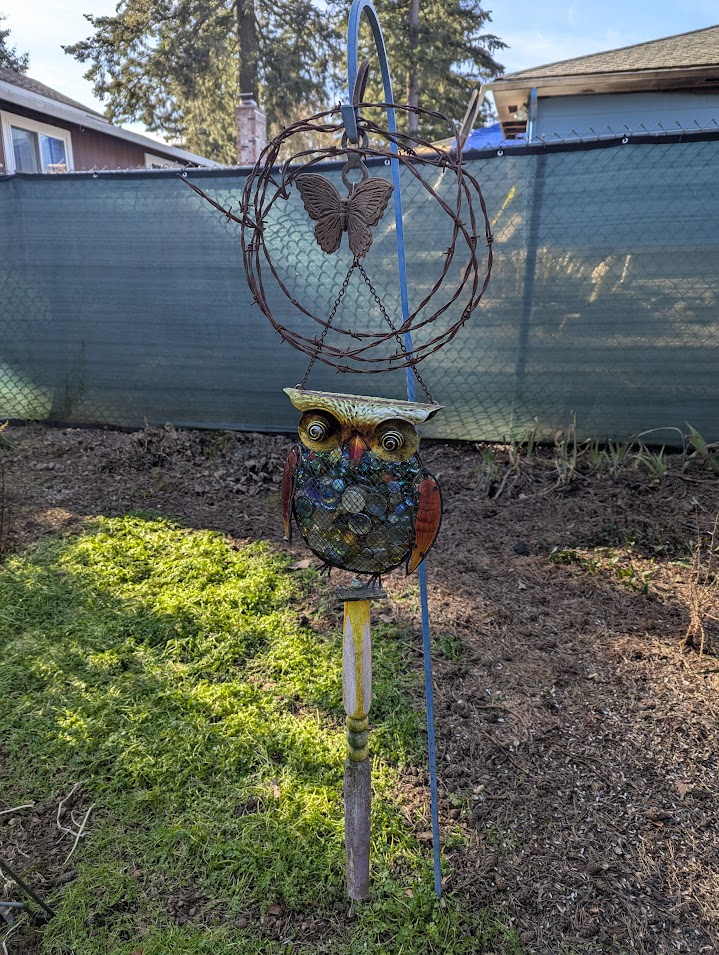
Or I just hang several things together: some rusty barbed wire, an “owl” my bonus daughter gave me (I think it was supposed to be a bird feeder, but the mesh is too large to hold seeds). I added marbles instead – we have no lack of of shiny objects! A newel post from a crib (that needs repainting).

I made a mobile out of old scrap metal I found in my son’s boxes in the attic (those I did not pass on to his children or widow) and rusty things in our yard. Odd things that I attached to a broken butterfly wind chime. A little copper wire and 20# fishing line ties it all together.

The Crescent Moon. This was in a pile of garbage some <expletive> contractor dumped in a favorite camping spot of ours, one we will never get to revisit because the road has been closed for six years. It is a portion of a fiberglass window. The rest of the garbage was just that: fiberglass, broken wood, and things that should have been hauled to a landfill, but there was this with its rounded edges and crooked break. I etched the face and inked it in. It spins in the breeze.

Beauty out of ashes. Beauty out of garbage. There’s an object lesson there. Make something beautiful out of the life you are handed, even when someone dumps a load of crap in your lap. Let God make something beautiful out of the garbage heap and scraps of your life. Repurpose the discards.

Simple things.

Read Full Post »

How’s that for a catchy title?

It all started when a friend who lives in EnZed sent me an idea for Hallowe’en decorating – before I even had the decorations pulled out. It was of a pumpkin black cat lantern (you can see it here). Cute, but it involves real pumpkins and carving them. The pumpkins aren’t so bad, but I knew I was not going to want  to carve them or paint them, so I thought I’d just bypass all that.

Ha.

I bought a package of balloons and pulled out my trust bottle of fabric starch and the roll of black crepe paper. I’ve had both the starch and the crepe paper for about the same amount of time, which could be 20 or 30 years. The starch never gets old, amazingly.


I learned how to do this poor man’s papier maché when I was in the 5th grade. You cut the crepe paper into workable strips, wet it with the starch, and attach it to the balloon. Add layers, let dry, pop the balloon when dry & you have a form.

I’ve never tried to be so exacting with the cut out, however. But I drew my pattern on the balloons with a marker and set to work.


I used red and white crepe paper for the places where there would be “gaps” – where the pumpkin would be cut out. Then I added several layers of the crape paper in all the spaces that would not have and cut outs. This is a messy procedure and I had to lay out a plastic cover underneath the dripping balloons.

After a coupl of days drying, I finally figures out how to do the black around the cut outs.


I used tracing paper to sketch out what was to be cut out, then I cut a template that I used on flat tissue paper. Tissue paper is pretty much the same consistency as crepe paper, just not crepe-y. I held the black template to the balloon and used a paint brush to dab on the starch until the entire section was covered.

It came out reasonably well. I gave up on two layers as it was just too much of a hassle (what was that about not wanting to scoop out a pumpkin and paint it?). I spent a couple more days using short strips of crepe paper to get an even texture and color. Eventually, I decided the bottom was ready for me to pop the balloon and get on with body building.


The cat has to be able to stand flat, and the head needs to sit on the shoulders, so I cut out the top & bottom of the form (bad move). I cut the ears out of the bottom or the top (that’s those triangle things).

Attaching the head was not so easy. The form wanted to fold in with the wet layers of crepe paper. The head didn’t want to hold still while I tried to carefully glue the crepe paper on with starch. I did manage to attach the ears to the head and I repaired the bottom form by setting it over a bowl to dry out (again).

Tonight, it dawned on me to use hot glue to attach the head. I have black ribbon that is an inch wide, and by running hot glue over the back diagonally, I was able to glue the top and bottom of the form together! I even ran hot glue around the base to give it a little more firmness.

IMG_20181030_183543

He’s certainly got attitude, even though he’s much too fragile to set out on the porch this tomorrow (the rain will melt him).

My last steps were to pop the balloon in the head and cut a small hole in the back so I could insert a little battery powered tea light into the head. Should go without saying that I set the cat over another battery powered tea light.

IMG_20181030_183611

Sadly, there’s no way to preserve and store this creation, so I will be tossing it into the trash on All Saint’s Day.

Next year, I think I’ll just buck up and buy the pumpkins. I have the paint, after all.


Read Full Post »